You sowed, you watered, you waited. And now your garden is overflowing with sun-warmed tomatoes, armfuls of herbs, and baskets of peppers. Or you just hauled off a trunk full of fresh produce from the local farmer’s market. The abundance is incredible… but there’s no way you can eat all of it before it goes bad. Now you’re googling “how to preserve twenty pounds of zucchini” and wondering how long till your neighbours start politely declining your squash donations.
This post-harvest scramble can feel concerning, but preservation for long-term food storage is your solution. Food preservation is a smart, modern skill that stretches your harvest across seasons, reduces waste, and creates a backup pantry that actually saves money. From freezing greens to stashing root veggies in cool storage, here’s how to turn short-lived produce into long-lasting value.
Choosing the Right Method for the Crop
There’s no one-size-fits-all approach to preservation. The key is matching the method to the produce, because using the wrong one can ruin texture, flavor, or even safety. Start by understanding each crop’s traits so you can build a flexible preservation system around the crops you grow the most:
- Is it high in acid or low?
- Does it have high water content?
- Is it starchy, leafy, or soft-skinned?
- How quickly does it spoil after harvest?
- Do you want to preserve flavor, texture, or nutrition most?
- How often do you use this ingredient and in what form?
- Is it best stored whole, chopped, or cooked?
- Will you be storing it short-term or long-term?
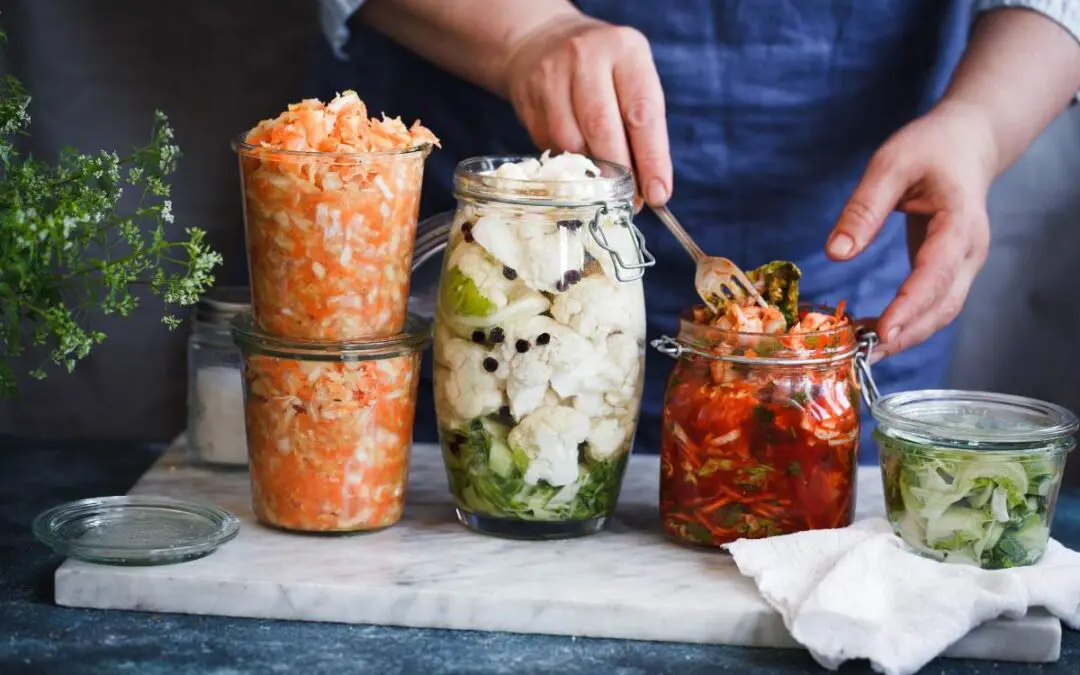
Water Bath and Pressure Canning
Canning can feel intimidating, but when you get the basics down, it becomes a powerful tool to lock in freshness, flavor, and nutrition for the long haul. Choose the correct canning method for the type of food you’re preserving.
Use water bath canning for high-acid foods like tomatoes, berries, jams, jellies, and pickles. These foods naturally resist harmful bacteria, so submerging sealed jars in boiling water is enough to safely preserve them. For low-acid foods like green beans, carrots, corn, and meats, you’ll need a pressure canner. Low-acid foods create the perfect environment for botulism if not heated to high enough temperatures. Pressure canning reaches 240°F or higher, killing off dangerous spores that water baths can’t touch.
Next, ensure that you have the essential tools:
- A large stockpot with a rack (for water bath) or a certified pressure canner
- Canning jars with new lids and rings
- A jar lifter and funnel for safe, clean filling
- Clean cloths, labels, and a permanent marker for tracking what you’ve preserved
Most importantly, do not improvise. Follow a tested recipe from a trusted source because canning requires precision. While there’s assuredly a learning curve, you’ll find that canning is one of the most satisfying ways to preserve your garden’s peak.
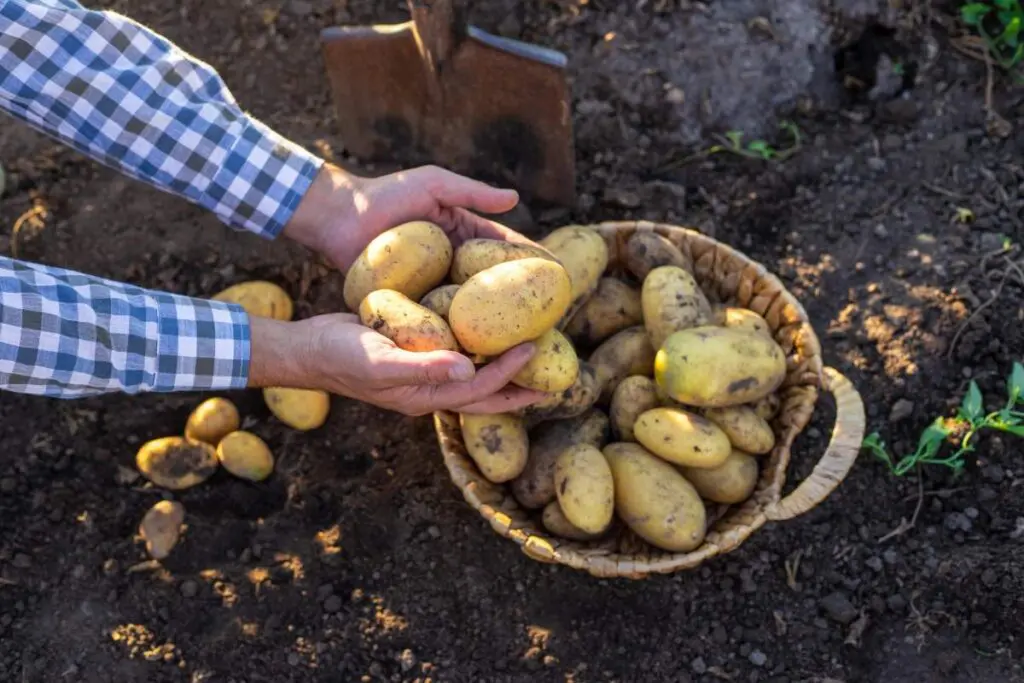
Root Cellaring and Cool Storage
Not everything needs to be cooked, frozen, or processed to last. Crops like potatoes, carrots, beets, squash, and onions prefer to be left alone. With the right storage conditions, these staples can last for months. Even without a full underground cellar, you can mimic nature’s own preservation forces by controlling these key variables:
- Temperature: Ideally 32°F to 50°F depending on the crop.
- Humidity: 85-95% keeps roots firm and fresh.
- Airflow: Proper ventilation avoids moisture buildup and rot.
Onions, garlic, and winter squash need dry conditions, while carrots, beets, and rutabagas like it damp. Layering straw, sawdust, or sand between vegetables helps maintain humidity and reduces spoilage. Lastly, remember not to wash the produce before storage. Instead, brush off dirt and inspect it for any damage that may spread quickly.
Blanching and Freezing
Freezing is a fast and accessible way to preserve your harvest, but works even better if you prep things properly: enter blanching. Blanching halts enzyme activity that continues after harvesting and works particularly well for beans, broccoli, and leafy greens that would otherwise turn mushy or lose color. Here’s how to do it:
- Boil a large pot of water.
- Submerge small batches of vegetables for the recommended time (usually between one and four minutes, but you should consult a reference chart to be sure).
- Immediately transfer to an ice water bath to stop cooking.
- Drain thoroughly and pat dry before freezing.
For long-term success, packaging matters: use freezer-safe bags or containers, squeeze out excess air, and label clearly with dates. Vacuum sealers also work well if you’re serious about space-saving and reducing freezer burn.
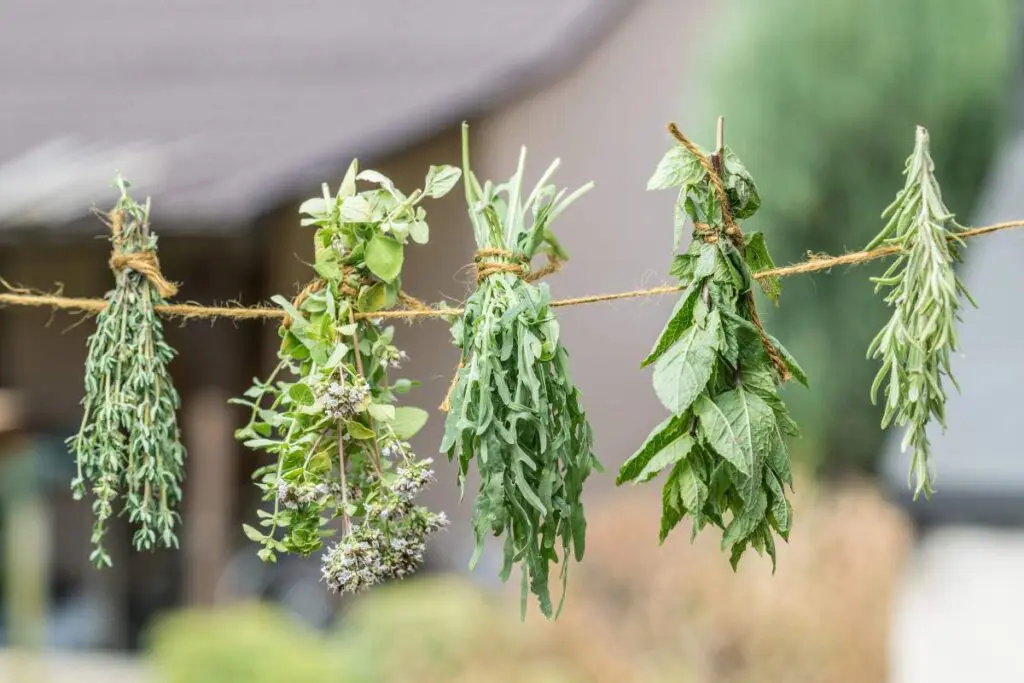
Drying Herbs and Seed Saving
Herbs and seeds are the unsung heroes of garden preservation. They’re small, potent, and packed with long-term value. Drying herbs builds a homegrown spice rack while saving seeds turns this year’s harvest into next year’s bounty.
Using herbs like basil, oregano, thyme, mint, and rosemary:
- Bundle them with string and hang them upside down in a dry, dark, well-ventilated spot.
- Avoid sun exposure to degrade flavor and color.
- Once fully dried (usually within 1-2 weeks), remove the leaves from the stems and store in airtight glass jars or tins.
Seed saving takes a little bit more planning:
- Choose open-pollinated or heirloom varieties for reliable results.
- Let the seeds mature on the plant fully, then dry them completely before storing.
- Label each batch clearly with crop name and date.
- Keep them in a cool, dark place in paper envelopes or glass jars.
Planning with Preservation in Mind
The best preservation strategy starts before the harvest. Smart planning at the planting stage can help set you up for waste reduction and easier storage later on. Prioritize high-yield, preservation-friendly produce like tomatoes, green beans, peppers, kale, carrots, and herbs. These crops all store well using multiple methods.
Stagger your plantings to avoid everything ripening at once. This gives you a steady harvest window and prevents the “all at once” panic that leads to water. If you pair this with companion planting, you can time your harvest more efficiently. For example, plant fast growers (like radishes) with slow ones (like carrots), or plant herbs near crops they’ll flavor later in the kitchen.
Lastly, turn your harvest calendar into a seasonal ritual to make this practice more sustainable and avoid overwhelm all at once:
- Assign monthly tasks like blanching greens in spring, canning tomatoes in summer, root cellaring squash in fall.
- Match preservation efforts with school breaks, holidays, or weekends for built-in family rhythm.
- Make it part of seasonal eating so your body and your pantry stay in sync.
Preserving your harvest is a practice in consistency. The same applies to your body: sustained energy and performance don’t come from a single fix, but from daily habits that stack over time. That’s why something like CHOQ Daily makes sense: a foundational adaptogen blend designed to promote healthy energy, focus, and hormone balance with consistency, not spikes.
Garden to Pantry Roadmap
There’s a particular kind of satisfaction that comes from grabbing a jar of home-canned sauce or a bag of frozen greens in the dead of winter and thinking, “I grew that.” Preservation turns gardening from a seasonal hobby into a year-round asset. At the same time, you become more equipped to start building your emergency food supply.
Build systems that make storage feel doable, not daunting. Over time, preservation stops being a chore and becomes a rhythm. So the next time your garden overdelivers, don’t panic… preserve.